Showing posts with label DIY. Show all posts

Revamping My Desk


I've been using this desk in my sewing room. It was so cluttered and cramped I felt claustrophobic every time I sat down. For one thing, there are two shelves, which leaves little room for even my laptop to sit comfortably. The only space on the desk itself is covered with a sorting tool that doesn't really help because I can't see what's in it, anyway. I have no proper storage for my three boxes of fabric, so they just sit there stacked next to it. I was placing things on shelves I never really use, and this left no space for what I do. Plus, there's a terrific cork board behind a good part of it, too, but the third shelf makes it impossible to use! So I decided to make my own "mood board" and go about making this space a bit more "Feng Shui".

 First I unscrewed and took out the second shelf. Better already!


Then I found some awesome fabric and cut it to the exact measurements of the cork and ironed some iron-on adhesive to the back of it. Iron-on adhesive rocks. It turns anything into iron-on. Love it!


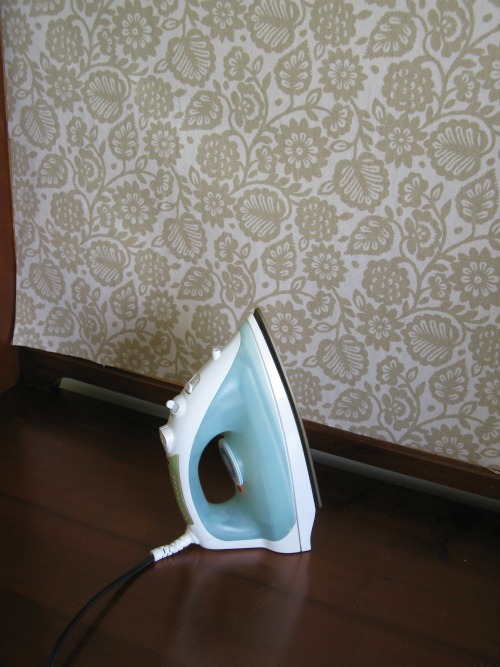
Next, I just ironed it onto the cork with no steam. If you're going to do this, I advise you to turn off the steam on your iron. And don't let the iron sit anywhere too long, and be careful not to let it sit too long on any part of the wood! I held up the fabric onto the cork board with two thumb tacks. I swept across it from top to bottom, center to the outsides. Again, take your time, don't let the iron sit anywhere too long, ok?

Next, I added a retro seam binding to the edges with a glue gun. I used a piece of paper under the glue gun when I put it down so it wouldn't get on the wood.


I also went to Target and found easy storage for my fabric that cost me only $25. Goodbye boxes! I found there was very little I really needed on the shelves I had before so I put those away in a closet. Any files I had in my sorter I put into pretty folders and stood upright in magazine holders, which gave me more space. Then I used sewing pins and old sewing needles to pin up inspiration on my mood board.


This corner of my sewing room is ready to play!


Yarnable Wednesday: Dyeing Eggs


eggs dyed with embroidery floss by Margarita

Although I am a Passover girl, I had to share these amazing egg dyeing techniques. I love Easter eggs, and to be honest, making them was a great delight when I was young. My grandparents celebrated Easter and I remember wearing the most ruffled dress imaginable, carrying my basket, and looking for eggs. I think they still have footage of me slipping and falling on my ruffle-butt undies, Mary Janes and lace-edged socks high in the air!

In the Passover Seder, an egg is placed on the Seder plate to represent the coming of spring and new life. We dyed those eggs as well (our own family tradition). Here's some terrific ways to snazz up your lawn or your Seder plate:

Eggs Dyed with Embroidery Floss

These eggs by Margarita on her Greek blog, Syntages...Apo Spiti, are so cool and they look like they've been resting in a nest of yarn! Follow the link to her blog to learn this technique. This is such a unique look, and a wonderful idea! I think I might try wrapping instead of cutting, or trying to make designs with the thread. I'm definitely inspired!

from the blog Syntages...Apo Spiti

Silk-Dyed Eggs

Sara from Ourbestbites.com posted this excellent idea of recycling silk ties and using them to dye eggs! It's so inventive, and you get the most beautiful patterns! Go here for the full tutorial.


Temporary Tattoo Eggs

Country Living just recently posted the idea of making your own temporary tattoos, which you can then apply to eggs. It's super sweet and sophisticated, for those who love a Victorian twist. Or any other images you can download!

Photo by Burcu Avsar


Happy Egg Dyeing!


DIY Thread Rack Projects

Hullo, Creatives! While sewing costumes for The Music Man it finally dawned on me that I really need a thread rack. It's bad. The tails of loose thread from each spool are forming their own united cluster and I'm afraid they will morph into some sort of super being that will take it's revenge on me (using swan snips, of course).

Ok, enough joking. There's the boring white rack that everyone knows, or if you want to be cool, there's these three stylish DIY projects I found on the web. Now to figure out which one I'll try...

#1  Festotu


Dreidel Garland and Decor


Remember that lovely image I posted from BHG.com of the dreidel garland? Well, I set out to make it for my home. If you love these patterns, you can also just print and cut them out on heavy card stock. I wanted to use different colors, so here is my version. First, download and make a template from the printable by The Party Dress:


Then you will need all sorts of colored card stock. Trace the template, fold the tabs, and assemble. It's best to trace with a pencil on the back side of the paper, making sure you use a ruler to mark the fold lines, too. Press down enough with the pencil to make an indentation in your thick card stock. This will  make the paper fold just where you want it to.  


Use double stick tape or hot glue to assemble.


Make a bunch! Next you will need to make the stem of the dreidel. I used a square balsa wood dowel and cut it with an x-acto. 


Now get a large upholstery needle and some cotton string. Knot before and after each dreidel. You will need a delicate touch in poking through so you don't crush your dreidels! I found twisting the needle with a 
little pressure was enough to poke a hole.


Hooray!


I'm also super proud of my arrangement for the mantle:

Craft It Up: Block Printing

I've been under the weather lately. You'd think I'd be glued to my computer, but I've been more of a couch potato. Anyhow, I had to share this terrific idea for block printing with, you guessed it, yarn! This project was created as part of a guest blogger series by the talented Stephanie of Modern Parents Messy Kids, and her full tutorial is found at Whip Up.


The best ideas really are the most simple. They're not just for kids, either. The best ideas are ageless!


Etsy Crush: Geometric

I am loving all this geometric-inspired art, jewelry, sculptures, and home decor I've seen lately!
I wish I could show them all, but here are my favorites.


1. Togl . Print by Twamies
2. Modern Neon Christmas Tree Decorations Ornaments by Sketch.inc
3. Geometric Necklace Neon Arrows and Stripes, leather by Boo and Boo Factory
4. You Rock card, gocco screen printed by Rank and File


And while we are into tip top shapes (bad joke, I know), 
check out this nifty DIY Paper Gemstone project by Kate at Minieco.co.uk:


Templates included! Have a geometric weekend!

Lace Bowl and Votive

I love this glowing votive bowl of lace made by Meg at Spirello.


Google didn't translate the page so well, but I believe she made it with lace doilies (not the paper kind), some fabric stiffener, and a balloon. Simply saturate the doilies with the stiffener, lay them on a balloon, allow to completely dry, pop the balloon, and you now have a beautiful bowl and votive for the holidays!

Thanksgiving Whisk Mobile

I can't believe Thanksgiving is almost here. Well, I can, due to the subliminal messages I've been trying to ignore: namely "sweet potato pie now!" and "pumpkin pie time!". I can't get that spice mix orange out of my head. Anyhow, I thought Thanksgiving was a good time to try out my whisk mobile idea, and now I can use it as our centerpiece!


I started out with a $2.00 whisk I bought at Ikea. They had one with a wooden handle and a loop for hanging at the end, which is perfect. You will need needle nose pliers for this and/or wire cutters. Snip the very center of each "loop".


Bend the branches back and arrange how you like. I put 8 straight out (leaving that nice curve) and then left 4 facing down. I thought of a chandelier and bent the branches accordingly.


Then make loops at the end of each branch.


Now for the decorations! Since there's a cooking theme (there is??), I used parchment paper
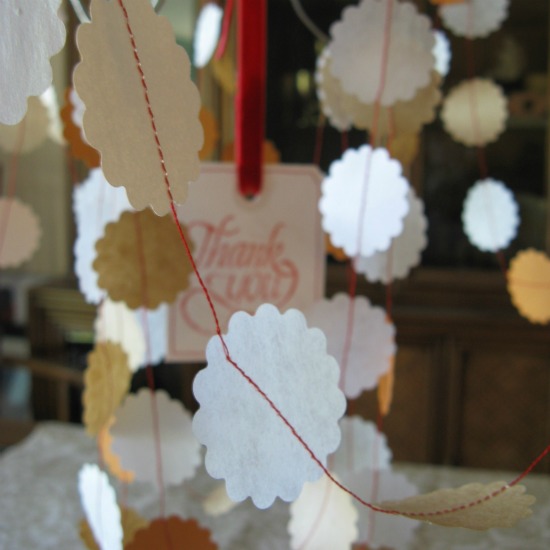
and brown paper. Then I mixed in the nice spice orange stationary I had. You'll also need a Fiskar's punch: now punch those babies out! The look like little pies...yum!


String them together using red thread allowing a 3/4 in. space in between...


Then drape your long string on all branches (in the loops you made earlier, remember?)


Time for your center pendant. I know you got excited when you saw that red velvet ribbon!
Use an orange marker or ink pad to print "Thank You" on a white oak tag. Then stitch the edges.


Measure how long you want your "thank you" to dangle inside your mobile, then double it. Insert the ribbon through the hole and hot glue the end to the back of the ribbon. Then tie the ribbon around the handle at let it dangle in the middle.


Now string it up with some of your favorite jute or ribbon and hang where desired!

I don't take credit for the hutch in the distance. We've been living in someone else's home!